
")
There’s nothing quite like the sound of lumpia sizzling in the pan—it instantly takes me back to family gatherings, birthday parties, and lazy Sunday afternoons in my Lola’s kitchen. Growing up Filipino, lumpia was more than just food. It was the centerpiece of celebrations, a reason to gather around the kitchen table, and a delicious reminder of home.
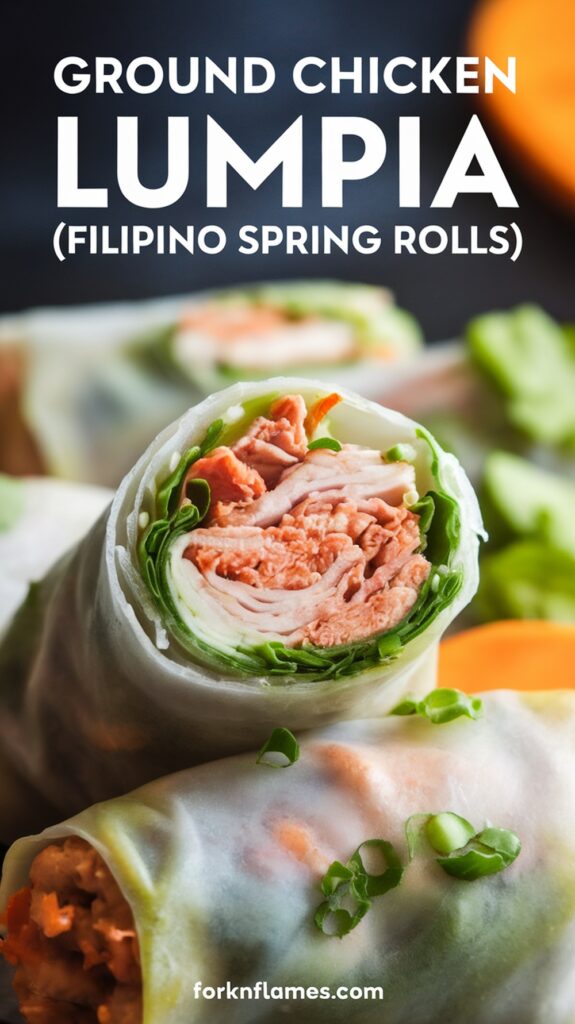
While there are many types of lumpia (some fresh, some fried, some with pork or vegetables), this version using ground chicken is one of my absolute favorites. It’s lighter than pork lumpia, still flavorful, and super crispy when fried just right. If you’ve never made lumpia before, don’t worry—I’ll walk you through every step. Once you get the hang of rolling, you’ll be hooked.
Let’s dive in!
Ingredients:
For the filling:
- 1 lb ground chicken
- 1 cup finely chopped carrots (about 2 medium carrots)
- 1 cup chopped green onions (scallions)
- 3 cloves garlic, minced
- 1 small onion, finely chopped
- 1 tablespoon soy sauce
- 1 tablespoon oyster sauce (optional, but adds depth)
- 1 teaspoon salt
- ½ teaspoon ground black pepper
- 1 egg (helps bind the filling)
For wrapping and frying:
- 25–30 lumpia wrappers (spring roll wrappers, not egg roll size)
- Water or beaten egg (for sealing the edges)
- Cooking oil (for deep or shallow frying)
Instructions:
1. Prep the filling
In a large bowl, mix together the ground chicken, chopped carrots, green onions, garlic, onion, soy sauce, oyster sauce (if using), salt, pepper, and egg. I like to use my hands (with gloves!) to make sure everything is well combined. The mixture should be evenly distributed and slightly sticky.
Let it rest in the fridge for 15–30 minutes so the flavors can really meld. Meanwhile, separate your wrappers and cover them with a damp towel to keep them from drying out.
2. Roll the lumpia
This part gets easier the more you do it—I promise.
- Lay a wrapper on a flat surface, one corner facing you (like a diamond).
- Spoon about 1 to 2 tablespoons of the filling near the bottom corner.
- Spread the filling into a thin log shape, about 3 inches long.
- Fold the bottom corner over the filling, then fold in the sides.
- Roll tightly toward the top corner.
- Dab a bit of water or egg on the final corner to seal.
Place the finished lumpia seam-side down on a tray. Repeat until the filling is gone. (You can freeze them at this point if you’re not cooking all of them right away!)
3. Fry until golden perfection
Heat about 1 to 2 inches of oil in a deep skillet over medium-high heat. To test if it’s hot enough, drop a small piece of wrapper in—if it sizzles, you’re good to go.
Carefully fry the lumpia in batches, turning occasionally, until golden brown and crispy—about 4 to 6 minutes. Don’t overcrowd the pan, and keep the heat steady so they cook evenly.
Drain them on a plate lined with paper towels.
Serve & Enjoy

Serve hot with a side of sweet chili sauce, banana ketchup, or even just vinegar with minced garlic and chilies (my personal favorite). These little rolls are super addictive—I always end up eating a few before they even make it to the table.
A Few Tips:
- Freezing tip: Freeze uncooked lumpia on a baking sheet, then transfer to a zip-top bag. You can fry them straight from frozen—just cook them a bit longer.
- Customizing: Feel free to add other veggies like cabbage or water chestnuts. If you want to go traditional, you can swap chicken for ground pork.
- Make it a meal: Pair with pancit, rice, or a crisp side salad.
Whenever I make lumpia now, it fills my kitchen with the same aroma I remember from childhood. It’s a little piece of home, wrapped up in crispy golden goodness.
If you try this recipe, let me know how it goes—and don’t forget to make extra. These things disappear fast.